
Here is how the variants of the Galaxy Tab 2 get their model number:
- First digit: 5 for Tab 10.1, 3 for Tab 7.0
- Final three digits: 100 for 3G, 110 for WiFi international, 113 for WiFi American
Galaxy Tab 2 7.0 GT-P3100 (3G + WiFi)
Galaxy Tab 2 7.0 GT-P3110 (WiFi)
Galaxy Tab 2 7.0 GT-P3113 (WiFi U.S.)
Galaxy Tab 2 10.1 GT-P5100 (3G + WiFi)
Galaxy Tab 2 10.1 GT-P5110 (WiFi)
Galaxy Tab 2 10.1 GT-P51113 (WiFi U.S.)
If you own any of these devices and looking for a way to root and install the ClockworkMod recovery on it, below you will find a lucid tutorial that will escort you to do so safely.
Make Some Preparations:
There are certain things that you require to before jumping to the rooting your Samsung Galaxy Tab 2 10.1 WiFi and installing ClockworkMod Recovery on it.- Make sure you have installed Samsung Kies or Samsung USB Drivers on your computer. If you have Samsung Kies installed on your computer, you need install the USB Drivers but make sure that Kies is not open while you are going through the rooting stuff.
Samsung USB Drivers
Download Latest Samsung KiesDownload Samsung USB Drivers [older]- Download the appropriate CF-Root file from
the link below and extract the zip to get the file with .tar extension.
If you are not sure about your device model number, check it from Settings> About.
- Download the CWM flashable SuperUser package from below. Do not extract the zip and copy it to the root/main directory of your Tab’s SD Card (not in a folder).
- Backup or sync all important data such as contacts, messages and apps present on your Galaxy Tab. Backup your contacts, call-logs, messages, APNs, bookmarks, calendar, apps & games using these nice free apps.
- Charge the device’s battery to at least 70% battery level.
- Go to Settings of your Tab 2 and enable USB Debugging mode from Settings> Developer options.


Download the Resources and Tools:
1. Download Odin3_v1.85.zip and extract the zip to your desktop.3. Download and install either Samsung USB Drivers or Kies on your computer:
2. Download CF-Auto-Root zip package for your Galaxy Tab 2, depending on its model number and extract (unzip) it on your desktop to get the file with .tar extension:
- CF-Auto-Root-espressorf-espressorfxx-gtp3100.zip
- CF-Auto-Root-espressowifi-espressowifixx-gtp3110.zip
- CF-Auto-Root-espressowifi-espressowifiue-gtp3113.zip
- CF-Auto-Root-espresso10rf-espresso10rfxx-gtp5100.zip
- CF-Auto-Root-espresso10wifi-espresso10wifixx-gtp5110.zip
- CF-Auto-Root-espresso10wifi-espresso10wifibby-gtp5113.zip
- clockworkmod-touch-p3100.tar
- clockworkmod-touch-p3110-p3113.tar
- philz_touch_5.08.5-p5100.tar.md5
- philz_touch_5.08.5-p5110.tar.md5
- philz_touch_5.08.5-p5113.tar.md5
Installing Root Package on Galaxy Tab 2:
Note
that all files with CF-Auto-Root in their name are rooting packages
only. The users of Tab 2 P3100, 33110, P3113 and P5113 will have to
install the root package after installing the CWM Recovery from above.
- Make sure you have copied the SuperUser file to the device as directed above.
- Turn off your Tab and boot it into Download mode. Press and hold the Volume Up and Power buttons simultaneously. On the next screen press Volume Down to confirm and continue to enter into Download Mode. In case you have Galaxy Tab 2 7.0 (P31XX models), press and hold Volume Down + Power buttons to get into the Download mode.
- Open the extracted Odin folder and double click and run Odin3 v1.85.exe as administrator.
- Now hook up your device to computer via USB Cable and wait till the ID:COM port at Odin turms yellow and you see “Added!!“ text at the message box on Odin.
- Make sure that only Auto Reboot and F. Reset Time options are ticked on Odin.
- Now click on PDA button and select .tar file from the CF-Auto-Root folder.
- Having selected the file, hit the Start button and let Odin install the root package on to your device.
- When the installation is finished and you get a PASS! message, your device will reboot automatically.
- Disconnect the USB cable and wait till the device boots up.
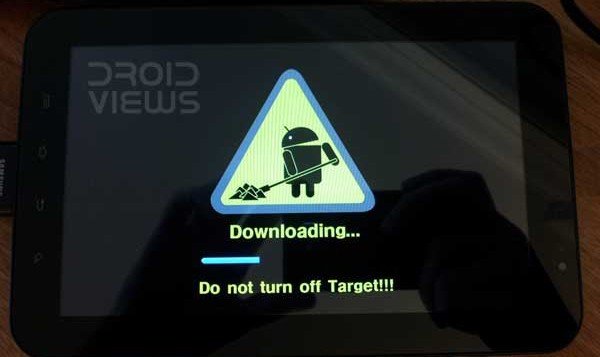

How to Install CWM Recovery on Galaxy Tab 2:
Having successfully rooted your Samsung Galaxy Tab 2, you can also consider installing ClockworkMod
Recovery on it. If so, the steps are almost the same as those you
followed above while rooting the device using Odin. The only thing that
differs is that this time you have to select the CWM file with .tar
extension after clicking the PDA button on Odin.
- Turn off the device and put it into download mode.
- Launch Odin and connect device to computer.
- Click on PDA button and select the CWM (ClockworkMod) file with .tar extension downloaded from above.
- Then hit the Start button and wait till installation finishes, you see PASS!! message on Odin and your tab reboots.
- Disconnect the USB cable now.
How to Reboot Galaxy Tab 2 in Recovery Mode:
- For Tab 2 7.0 users: Boot your device into Recovery mode: press and hold Volume Up+Power buttons together for a few seconds till the screen turns up.
- For Tab 2 10.1 users: To boot your Tab 2 10.1 into Recovery mode, hold Volume Down+Power buttons till you see Samsung logo with device name and then release the Power button. When you see 2 icons, release the Volume Down button too. Use the Volume Down key to navigate between the 2 icons and Volume Up to select it. Highlight the the left icon (box) and then select it using Volume Up to enter recovery mode.
- In Recovery mode, use the volume buttons to navigate and the power key to select an option or file.
Root Checker


www.mm-knowledge.com
နည္းပညာၿမိဳ႕ေတာ္

No comments:
Post a Comment